Introduction
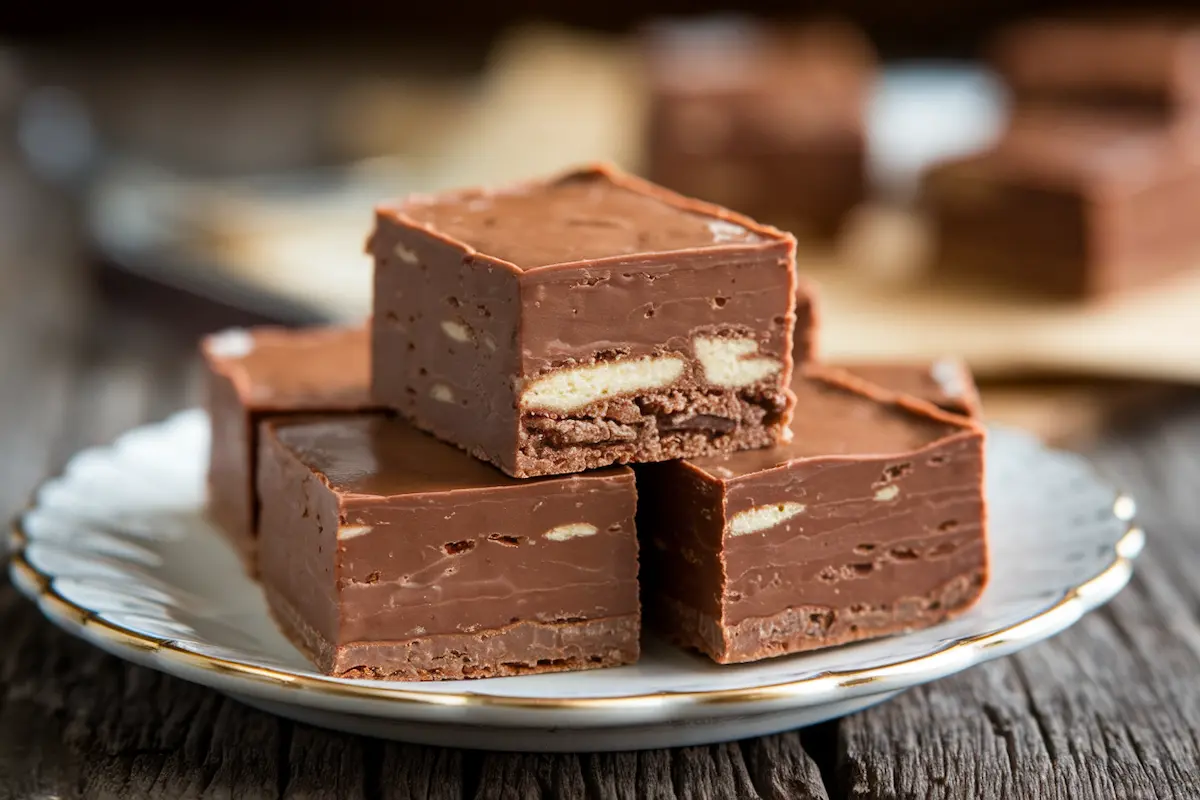
There’s something magical about the process of making fudge from scratch. It’s a tradition that spans generations, often shared among families during the holidays or special gatherings. Among the myriad of fudge recipes out there, Old Fashioned Hershey Cocoa Fudge stands out as a timeless classic. With its rich, deep chocolate flavor and perfect balance of sweetness and creaminess, this fudge is a true indulgence that transports you back to simpler times.
Whether you’re a seasoned candy maker or a beginner looking to try your hand at a classic recipe, Old Fashioned Hershey Cocoa Fudge is a must-try. This blog will guide you through the history of fudge, explore the key ingredients that make this recipe special, and provide a step-by-step guide to ensure your fudge turns out perfectly every time. We’ll also share some tips for variations, storage, and serving suggestions to make the most of this decadent treat.
The History of Fudge
Fudge, a beloved confectionery treat, is thought to have originated in the United States in the late 19th century. While the exact origin of fudge is somewhat unclear, it’s widely believed that it was the result of a happy accident—a botched attempt at making caramel or toffee. Instead of creating a hard candy, the cook ended up with a soft, creamy confection that quickly gained popularity.
By the early 20th century, fudge had become a staple in American households, particularly during the holidays. Recipes were passed down through generations, each family adding their own twist. Hershey’s cocoa, introduced in 1894, became a popular ingredient for making fudge, thanks to its high quality and rich flavor. The simplicity and reliability of Hershey’s cocoa made it a go-to choice for home cooks looking to create the perfect batch of chocolate fudge.
Today, Old Fashioned Hershey Cocoa Fudge remains a beloved treat, cherished for its nostalgic flavor and the memories it evokes. It’s a recipe that has stood the test of time, proving that sometimes, the simplest recipes are the best.
Ingredients for Old Fashioned Hershey Cocoa Fudge
The ingredients for this classic fudge are straightforward, yet each one plays a crucial role in achieving the perfect texture and flavor. Let’s take a closer look at what you’ll need.
Main Ingredients
- Hershey’s Cocoa (2/3 cup): The star ingredient of this recipe, Hershey’s cocoa provides the rich, chocolatey flavor that defines this fudge. Its deep, dark cocoa taste is balanced by the sweetness of the sugar, creating a perfect harmony of flavors.
- Granulated Sugar (3 cups): Sugar is essential for creating the fudge’s smooth, creamy texture. It dissolves in the mixture and crystallizes during the cooling process, giving the fudge its signature consistency.
- Milk (1 1/2 cups): Milk adds moisture to the fudge and helps dissolve the sugar and cocoa. It also contributes to the fudge’s creamy texture.
- Butter (1/4 cup): Butter adds richness and flavor to the fudge, as well as contributing to its smooth texture. It helps to emulsify the mixture, ensuring that the fudge is not grainy.
- Vanilla Extract (1 teaspoon): Vanilla extract enhances the chocolate flavor and adds a subtle sweetness that rounds out the fudge’s taste.
Additional Ingredients
- Salt (1/4 teaspoon, optional): A pinch of salt can help to balance the sweetness and enhance the overall flavor of the fudge. It’s optional but recommended for a more complex taste.
- Corn Syrup (1 tablespoon, optional): While not part of the traditional recipe, adding a small amount of corn syrup can help prevent crystallization and result in a smoother, creamier fudge. This is particularly helpful for beginners.
Optional Mix-Ins and Toppings
- Nuts (1/2 cup, chopped): Chopped nuts like walnuts, pecans, or almonds add a delightful crunch and contrast to the smooth texture of the fudge. Simply fold them into the fudge just before pouring it into the pan to set.
- Marshmallows (1 cup, mini): Mini marshmallows can be folded into the fudge for a Rocky Road-style treat. They add a chewy texture and a bit of extra sweetness.
- Flaky Sea Salt: Sprinkling a bit of flaky sea salt on top of the fudge before it sets adds a modern twist, enhancing the chocolate flavor and providing a satisfying contrast to the sweetness.
Step-by-Step Instructions
Step 1: Prepare Your Equipment
Before you begin making the fudge, it’s important to have all your equipment ready. Fudge making requires precise timing, so having everything prepared in advance will help ensure success.
- Line the Pan: Line an 8×8-inch square baking pan with parchment paper or lightly grease it with butter. This will make it easier to remove the fudge once it’s set.
- Prepare a Candy Thermometer: Attach a candy thermometer to a heavy-bottomed saucepan. A candy thermometer is crucial for making fudge, as it allows you to monitor the temperature of the mixture accurately.
- Measure Your Ingredients: Measure out all your ingredients and have them ready. Once the fudge reaches the correct temperature, you’ll need to work quickly to add the butter and vanilla extract.
Step 2: Combine the Ingredients
- Mix the Dry Ingredients: In a large, heavy-bottomed saucepan, whisk together the Hershey’s cocoa, sugar, and salt (if using). Ensure that the dry ingredients are well combined before adding the milk.
- Add the Milk: Gradually add the milk to the dry ingredients, stirring constantly to create a smooth mixture. It’s important to dissolve the cocoa and sugar completely to avoid any lumps in the fudge.
Step 3: Cook the Fudge
- Bring to a Boil: Place the saucepan over medium heat and bring the mixture to a boil, stirring constantly. This ensures that the sugar dissolves evenly and prevents the mixture from burning.
- Cook to the Soft Ball Stage: Once the mixture reaches a boil, stop stirring and allow it to cook undisturbed until it reaches 234°F (112°C) on the candy thermometer. This is known as the “soft ball stage,” where a small amount of the mixture dropped into cold water forms a soft, pliable ball. Reaching this stage is critical for achieving the correct texture in your fudge.
Step 4: Cool and Beat the Fudge
- Remove from Heat: Once the mixture reaches the soft ball stage, remove the saucepan from the heat immediately.
- Add Butter and Vanilla: Stir in the butter and vanilla extract, but do not mix the fudge just yet. Allow it to cool to about 110°F (43°C) before beating. This cooling period is crucial for the fudge to set properly.
- Beat the Fudge: Once the fudge has cooled, beat it vigorously with a wooden spoon until it thickens and loses its glossy sheen. This can take several minutes, so don’t be discouraged if it seems to take a while. The beating process is what gives the fudge its smooth, creamy texture.
Step 5: Set the Fudge
- Pour into the Pan: Once the fudge has thickened and is no longer glossy, quickly pour it into the prepared pan. Use a spatula to spread it evenly.
- Cool Completely: Allow the fudge to cool at room temperature until it is fully set. This can take a few hours, but resist the urge to refrigerate the fudge, as this can cause it to become grainy.
Step 6: Slice and Serve
- Cut the Fudge: Once the fudge is completely set, use a sharp knife to cut it into squares. For clean edges, wipe the knife with a warm, damp cloth between cuts.
- Serve and Enjoy: Enjoy the fudge at room temperature for the best texture and flavor. This fudge pairs beautifully with a glass of cold milk, a cup of coffee, or a hot cocoa for an extra indulgent treat.
Troubleshooting Tips
Making fudge can be a bit tricky, especially if you’re new to candy making. Here are some common issues and how to fix them:
Problem: Fudge Is Too Soft or Didn’t Set
Solution: This usually happens if the fudge didn’t reach the correct temperature during cooking. Make sure your candy thermometer is accurate, and that you cook the fudge to exactly 234°F (112°C). If your fudge is still soft, you can try reheating it to the correct temperature and then beating it again.
Problem: Fudge Is Grainy
Solution: Grainy fudge is often the result of sugar crystals forming during the cooking process. To prevent this, make sure all the sugar is dissolved before the mixture comes to a boil, and avoid stirring once it starts boiling. Adding a small amount of corn syrup can also help prevent crystallization.
Problem: Fudge Didn’t Thicken During Beating
Solution: If the fudge didn’t thicken, it may have cooled too much before you started beating it. Be sure to start beating as soon as it reaches about 110°F (43°C). If it’s still too runny, you may need to reheat it slightly and try beating it again.
Variations and Additions
Old Fashioned Hershey Cocoa Fudge is delicious on its own, but it’s also a great base for adding your own personal touches. Here are some ideas for variations and additions:
Nutty Fudge
Add 1/2 cup of chopped nuts, such as walnuts, pecans, or almonds, to the fudge just before pouring it into the pan. The nuts add a delightful crunch and complement the smooth, creamy texture of the fudge.
Marshmallow Fudge
For a Rocky Road-inspired treat, fold in 1 cup of mini marshmallows along with the nuts. The marshmallows add a chewy texture and a bit of extra sweetness.
Peppermint Fudge
For a festive twist, add 1/2 teaspoon of peppermint extract along with the vanilla, and sprinkle crushed peppermint candies on top of the fudge before it sets. This variation is perfect for the holidays and makes a great gift.
Sea Salt Fudge
For a more modern take, sprinkle flaky sea salt on top of the fudge just before it sets. The salt enhances the chocolate flavor and adds a satisfying contrast to the sweetness.
Serving Suggestions
Old Fashioned Hershey Cocoa Fudge is a versatile treat that can be enjoyed in a variety of ways. Here are some serving suggestions to make the most of this decadent dessert:
As a Standalone Treat
Serve the fudge as a standalone dessert, either as part of a holiday spread or as an after-dinner treat. Its rich, chocolatey flavor makes it the perfect end to any meal.
Paired with Ice Cream
For an indulgent dessert, serve the fudge alongside a scoop of vanilla or peppermint ice cream. The cold, creamy ice cream pairs beautifully with the rich, chocolatey fudge.
With Coffee or Hot Cocoa
Pair the fudge with a cup of strong coffee or hot cocoa for a comforting and indulgent treat. The bitterness of the coffee or cocoa balances the sweetness of the fudge, creating a perfect harmony of flavors.
As a Gift
Fudge makes a wonderful homemade gift, especially during the holidays. Wrap individual pieces in wax paper or place them in a decorative tin for a thoughtful and delicious present.
Storing and Freezing Fudge
One of the great things about fudge is that it stores well, making it a convenient treat to make ahead of time or keep on hand for when a chocolate craving strikes.
Storing Fudge
- Room Temperature: Store fudge in an airtight container at room temperature for up to two weeks. Keep it in a cool, dry place to prevent it from melting or becoming too soft.
- Refrigerator: If you prefer your fudge a bit firmer, you can store it in the refrigerator. Just be sure to let it come to room temperature before serving, as cold fudge can be a bit too hard.
Freezing Fudge
Fudge freezes beautifully, making it a great make-ahead treat.
- Wrap the Fudge: Wrap individual pieces of fudge in wax paper or plastic wrap, then place them in an airtight container or freezer-safe bag.
- Freeze: Store the fudge in the freezer for up to three months.
- Thaw: To thaw, remove the fudge from the freezer and let it sit at room temperature for a few hours before serving. Do not refrigerate thawed fudge, as this can affect its texture.
Personal Anecdotes and Tips for Success
Making Old Fashioned Hershey Cocoa Fudge is a tradition in my family, especially during the holiday season. I remember standing on a stool beside my grandmother, watching in awe as she carefully stirred the bubbling pot of chocolate, waiting for the perfect moment to add the butter and vanilla. The aroma that filled the kitchen was intoxicating, and the first taste of that rich, creamy fudge was pure bliss.
Common Mistakes to Avoid
- Skipping the Candy Thermometer: It might be tempting to eyeball the fudge or rely on the cold water test, but using a candy thermometer ensures accuracy. Fudge making is a precise science, and even a few degrees can make a big difference in the final product.
- Rushing the Cooling Process: It’s important to let the fudge cool to the right temperature before beating it. If it’s too hot, the fudge won’t thicken properly, and if it’s too cool, it might become grainy.
- Overmixing: Once the fudge starts to lose its gloss and thickens, stop beating. Overmixing can lead to a crumbly texture rather than the smooth, creamy fudge you’re aiming for.
Serving Suggestions
This fudge is perfect for gifting during the holiday season. I love wrapping individual pieces in festive wax paper or placing them in a decorative tin tied with a ribbon. It’s a sweet way to share the love and joy of the season with friends and family.
FAQs (Frequently Asked Questions)
Q: Can I use a different type of cocoa powder?
A: While Hershey’s cocoa is the traditional choice for this recipe, you can use other unsweetened cocoa powders. However, the flavor and texture might vary slightly depending on the brand. Make sure to use unsweetened cocoa powder for the best results.
Q: What if I don’t have a candy thermometer?
A: While a candy thermometer is recommended for accuracy, you can use the cold water test as an alternative. Drop a small amount of the fudge mixture into a glass of cold water. If it forms a soft ball that flattens when removed, it’s at the right stage.
Q: Can I add other flavors to the fudge?
A: Absolutely! You can add extracts like peppermint, almond, or orange along with the vanilla for a unique twist. Just be careful not to overpower the chocolate flavor.
Q: How do I prevent the fudge from becoming grainy?
A: To avoid grainy fudge, make sure the sugar is fully dissolved before the mixture comes to a boil. Also, avoid stirring the mixture once it begins to boil, as this can cause sugar crystals to form.
Q: Can I make this fudge in advance?
A: Yes! Fudge stores well at room temperature or in the freezer, making it a great option for making ahead of time. Just be sure to store it in an airtight container to keep it fresh.
Conclusion
Old Fashioned Hershey Cocoa Fudge is more than just a sweet treat—it’s a piece of culinary history, a connection to the past, and a tradition that brings people together. Whether you’re making it for the holidays, as a gift, or just to satisfy a chocolate craving, this fudge is sure to delight.
The process of making fudge from scratch may require a bit of patience and precision, but the reward is well worth it. The rich, chocolatey flavor, the smooth, creamy texture, and the joy of sharing something homemade make Old Fashioned Hershey Cocoa Fudge a recipe you’ll want to return to again and again.